SmartDust CLI Client version 1.3.x
Description
SmartDust CLI client is a tool that enables connecting to devices present in Smartdust Lab instances via ADB (Android) and usbfluxd (iOS) through the command line. This in turn allows for automation of development/testing/etc. processes as connecting to devices can be done entirely in terminal script environments without touching the web UI interface. It enables usage of CI/CD tools such as Jenkins.
Installation
Install Ruby. For best compatibility, use Ruby 3.0 or later.
Then you can install Smartdust CLI client as a Ruby gem:
sudo gem install smartdust-client -v 1.3.3
Updating
If you already have the Smartdust CLI Client installed, you can update it by running:
sudo gem update smartdust-client
Device connecting tutorial
Prerequisites
- An account that you can log in to a Smartdust Lab with - you can make one by visiting smartdust.me
- Using a Linux OS and having basic knowledge regarding using the terminal - using Bash or zsh is recommended
- Android:
- Android Debug Bridge installed
- iOS:
- Smartdust version of
usbfluxdinstalled - refer to the iOS Remote Debugging documentation for instructions
- Smartdust version of
A Smartdust account with administrator privileges cannot be used with this tool, it doesn’t work!
You cannot reuse the same ADB key in another Smartdust account.
Steps:
Follow the installation instructions from above and make sure that the client is installed properly by entering smartdust-client in your terminal window.
You should see a description of the tool’s options.
Getting a Lab connection token
Obtain a Smartdust Lab connection token from a Smartdust Lab instance - for example at public.smartdust.me.
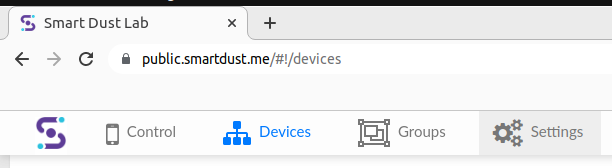
After logging in, click “Settings” on the upper menu bar:
Then go to the “Keys” tab and in the “Access Tokens” pane click on the “+” icon on the right.
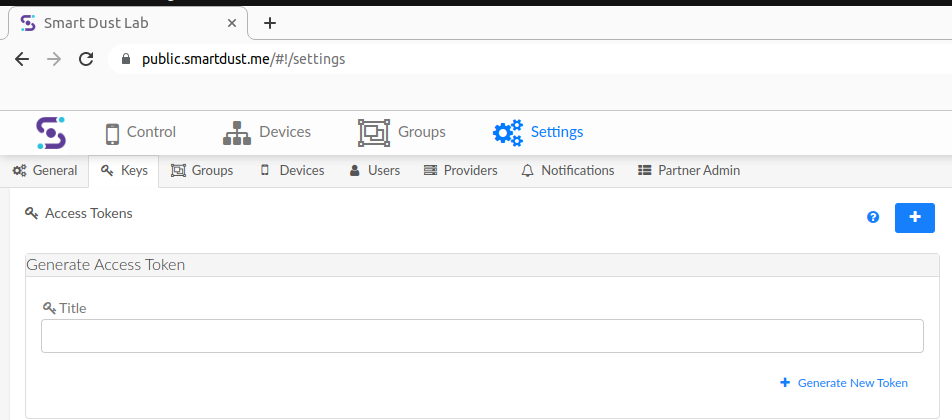 Name your token however you like and after clicking “Generate New Token” your token will be displayed as a string of characters.
Copy it and keep it somewhere you’ll have access to.
Name your token however you like and after clicking “Generate New Token” your token will be displayed as a string of characters.
Copy it and keep it somewhere you’ll have access to.
Go back to the main view of the Lab, for example by clicking on the Smartdust logo in the upper left corner.
Setting your Lab token and URL as environmental variables
Go back to the terminal. For convenience, it is recommended to set environmental variables for the token you just copied and the URL of the Smartdust Lab.
This is described by the tool itself when you run smartdust-client -h.
Instead of using environmental variables we can just pass appropriate flags when interacting with the client but for the purposes of this tutorial let’s proceed with the former.
Setting the variables we need in a Bash or zsh shell goes as follows:
export SD_TOKEN=your_copied_token
export SD_URL=https://[your_instance_name].smartdust.me
It might differ if you’re using a different shell, check for suitable instructions online.
As you can see, the Smartdust Lab URL must be passed in the full, including the https:// protocol signifier.
However, don’t add any trailing characters after the domain name of the Lab which might be displayed in your browser.
Connecting to Android devices
Connecting to a device for the first time
Keep the web UI interface of the Smartdust Lab open in your browser and in the terminal window use the freshly installed Smartdust CLI client like this:
smartdust-client connect --min=1 -n 1 -f platform:Android
If that’s the first time you’re connecting to a Smartdust Lab device using ADB, a popup should now appear in the web interface, prompting you to add a new ADB key. Confirm it and run the above command again.
It is highly advisable to use both --min and -n arguments and set them to the same value.
That’s it, the tool should now connect you to an available Lab device via ADB!
After it finishes its work, check adb devices and the devices should be available for you to use via ADB!
Keep in mind that the devices will appear as [instance_name].smartdust.me:xxxx where xxxx is a random port number assigned to the device by the Smartdust Lab instance each time.
If you want to connect to more devices and/or use particular types of devices, use the -h flag to find out more about a given command.
For example smartdust-client connect -h will show you all the available options for the connect command.
Connecting to iOS devices
Please go through the steps described in iOS Remote Debugging documentation before proceeding.
When connecting to iOS devices, Smartdust CLI relies on usbfluxd.
Before connecting to iOS devices usbfluxd needs to be run with root privileges:
sudo usbfluxd -n
Before connecting, disconnect from all possibly connected devices to get a clean state:
smartdust-client disconnect --all
One way to connect to an iOS device is by copying its serial number and executing the following command:
smartdust-client connect -f serial:[serial_number]
You should of course put the serial of your device after the colon.
That’s it! You can confirm the connected devices by listing them:
usbfluxctl list
It can surprise you, but there can be more than one device on the list. Due to the current connection mechanism, you get connected to all the iOS devices from one provider.
Disconnecting from the devices
In order to disconnect from all devices, both via ADB, usbfluxd and also to free them in the Lab, use:
smartdust-client disconnect --all
Behavior explanation
If no quantity flags (-n or --min) are specified, the client will try to connect to one device.
The -n flag is a soft criteria and only imposes a hard requirement of connecting at least n / 2 devices.
It is usually recommended to use both -n and --min flags and set them to the same value, as it will ensure that the client will keep trying to reach that number of connected devices.
If more devices are already connected, the client will do nothing.
Filtering devices (-f flag)
The -f flag allows you to filter devices by various criteria.
Keep in mind though that you can only use one filter at a time.
The filtering is applied only to connecting new devices, not to already connected ones.
Filtering used with the connect command never disconnects any devices with active sessions.
This means that for example smartdust-client connect -f platform:Android will not attempt any connection if you already have an iOS device connected (despite passing a filter for Android devices).
The quantity criterium (defaulting to 1) is satisfied by the connected iOS device, so the command will not do anything.
So if you wish to connect to an Android device, you need to first disconnect from the iOS one or request more devices with the -n and --min flags.
Troubleshooting
On a rare occasion that different users start the Smartdust CLI Client on the same device, there might be a permission issue with some temporary files the program creates.
In that case, forcefully delete the /tmp/stf-client.log and /tmp/stf-client.pid files.